Saturday, January 31, 2009

A Daring Baker's Challenge, and some personal ones

I have had plenty of time this week for various musings and thoughts on the past. These reminiscence is brought forward by the fact that I am currently employed as a full-time couch potato and kitchen fiend. But after watching the last episode of season 7 Scrubs on DVD, finishing my book and feeling that I could not stand to face another dirty bowl/spatula/countertop in the kitchen, I was forced to contemplate the plight of my existence. After losing a job I thought I could do well at, given sufficient time to adjust and rise up to some insurmountable challenges and responsibilities, I could not say that I was devastated. Maybe it was the fact that I have been through 4 jobs in 6 months---of which 2 ended on my terms---or maybe I just did not like that job very much.

Being impartial in your profession of choice is, in some ways, an advantage. Sure, you do not go to work feeling euphoric (then again, I have never experienced that, even when I was working as a pastry chef), but when something goes wrong you learn not to take it too personally. Sure, it is demeaning being told that you do not have the experience necessary for this particular line of work, but the grieving is over quickly, and you are able to look at the whole experience less as a dent in your uncertain future, and react to it with a defiant 'well, at least I had the balls to try it out!'


Now that my internet connection is back up and I can finally upload my photos for the January DB Challenge, I am back with the intention to blog and whine. This month's challenge is brought to us by Karen of Bake My Day and Zorra of 1x umruehren bitte aka Kochtopf. They have chosen Tuiles from The Chocolate Book by Angélique Schmeink and Nougatine and Chocolate Tuiles from Michel Roux.

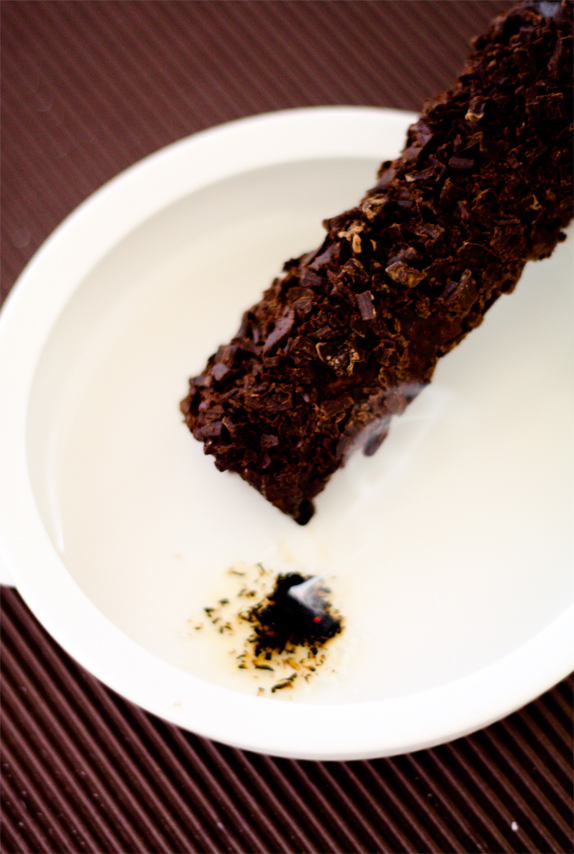
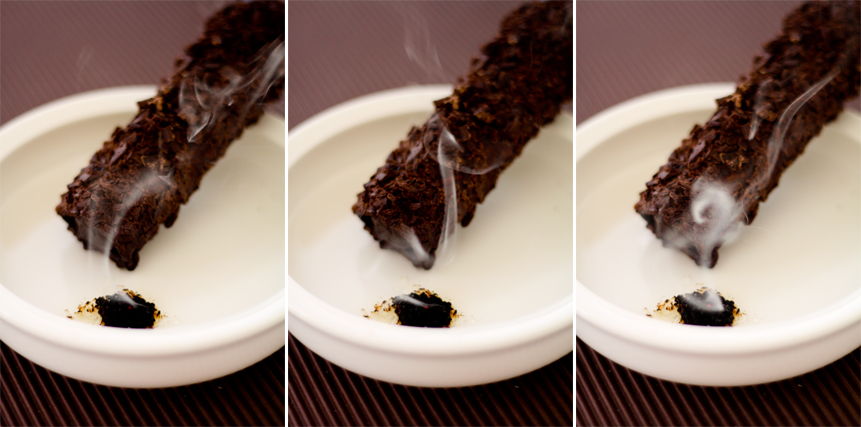
I had the initial idea for this project long before I made it, so I have only made the basic chocolate tuile recipe by Angelique Schemeink. As the visual clues would have leaked my little secret out to you, here it is in words: Chocolate-Encrusted Tuile with Smoked Chocolate Ganache.

Yes, I tried smoking chocolate---with more or less satisfying results, if I may be so bold as to add. Less because I could not yet control the temperature of my 'smoking chamber' (read: a bowl perched atop a bamboo steamer set above an aluminum container of smoking materials confined in the safety of my trusty wok) and scorched my chocolate a tiny bit as a result; and more because it tasted really good, and when the intention is to make it into a ganache, the temperatures hardly matters anymore (or so I'd like to think).

So what better than to pipe the ganache into cigar-shaped tuiles? Better yet, to coat the tuiles in a layer of melted chocolate, then cover it with shaved chocolate chunks for a textural contrast? Or, even better still, set it up to look like a half-smoked cigar? And so my plans all fall into place, and with the same note of optimism, I hope that my life will too.

Chocolate-Encrusted Tuile

65 grams softened butter
60 grams confectioner’s/icing sugar, sifted
2 large egg whites (slightly whisked with a fork)
65 grams all purpose flour, sifted
1 table spoon cocoa powder

300g Chocolate, half melted and half shaved with a vegetable peeler.

Using a hand whisk or a stand mixer fitted with the paddle (low speed) and cream butter, sugar and vanilla to a paste. Keep stirring while you gradually add the egg whites. Continue to add the flour in small batches and stir to achieve a homogeneous and smooth batter/paste. Be careful to not overmix.
Cover the bowl with plastic wrap and chill in the fridge for at least 30 minutes to firm up. (This batter will keep in the fridge for up to a week, take it out 30 minutes before you plan to use it).

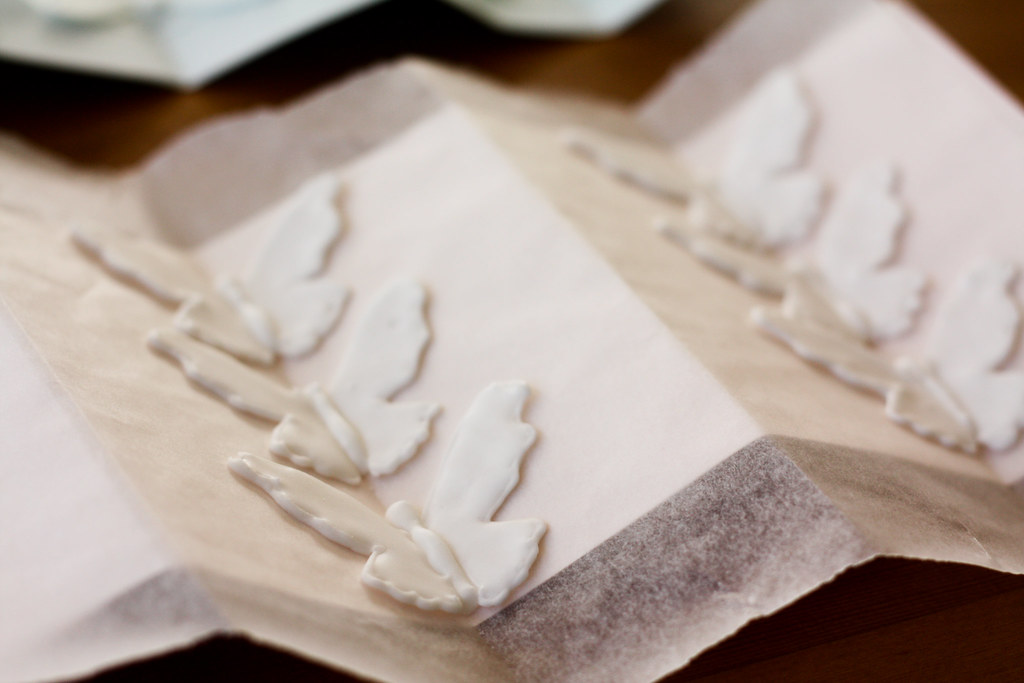
Line a baking sheet with parchment paper or grease with either butter/spray and chill in the fridge for at least 15 minutes. This will help spread the batter more easily if using a stencil/cardboard template such as the butterfly. Press the stencil on the bakingsheet and use an off sided spatula to spread batter. Bake at 180 degree Celsius for about 4 minutes.

Immediately release from bakingsheet and proceed to shape/bend the cookies in the desired shape. These cookies have to be shaped when still warm, you might want to bake a small amount at a time or them in the oven to warm them up again. Or: place a bakingsheet toward the front of the warm oven, leaving the door half open. The warmth will keep the cookies malleable. Leave to cool, and dip in some melted chocolate, then roll in shaved chocolate chunks. Set aside.


Smoked Chocolate Ganache

150 ml thick cream (35% fat)
105 g dark chocolate

Create a shallow container using an aluminum foil. Place ingredients for smoking in the container (I used dessicated coconut and Lapsang Souchong tea). Place the smoking materials in a deep wok and heat up for about 5 minutes or until smoking. In the meantime, prepare a bamboo steamer and a stainless steel bowl of chocolate pieces. When ready, turn off heat and place bamboo steamer on top of the smoking materials, and set the bowl of chocolate on top. Cover with lid and smoke for 15-20 minutes. Note: As I mentioned earlier in this post, the chocolate will burn a little due to the high heat in the smoking chamber, and I am still working on a better way to do this.

Spread the chocolate onto a sheet of parchment paper to cool. If you are using couverture chocolate, blooms will become very apparent after the chocolate solidifies. Your chocolate may also cools down softer and not hold the 'snap' that characterises a perfectly tempered chocolate. For this purpose only, this is acceptable.

Boil cream in a saucepan. Place smoked chocolate in a bowl, and pour boiling cream to melt the chocolate. Stand for 1-2 minutes, then stir to create a homogenous mixture. Leave to cool at room temperature, stirring occasionally to ensure even cooling. When consistency is firm enough to pipe, transfer into a piping bag fitten with a plain nozzle, and pipe into chocolate-encrusted tuile cigars. With a hot but dry spatula, smooth off the ends to create a better finish.

Tuesday, January 13, 2009

New Year's Resolutions, and some seasonal surprise


The new year is here, and I finally came up with a few resolutions I would like to achieve this year.

1. Blog more regularly. Actually, just blog more. Yes, I know, I know.
2. Attempt making more intricate gateaux/desserts at home. I am usually very lazy when it comes to making multi-component desserts at home because firstly I would have to do all the dishes, and secondly, I usually crave comfort food when I am at home, thus instant gratification were the words of the day last year.
3.Get a step closer to my dream of opening a contemporary patisserie.
4.Bake more seasonally, creatively, and sustainably.
5. Frequent the farmers' market more, well, frequently.


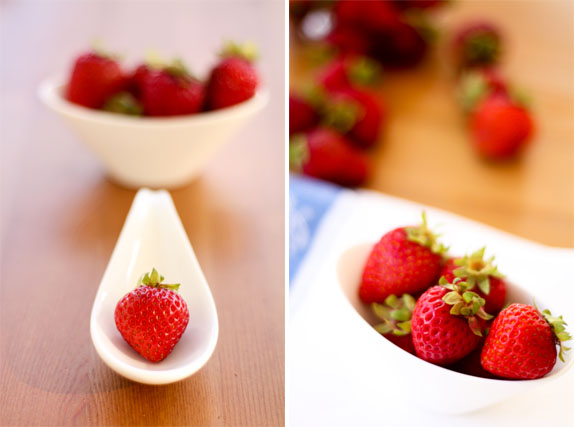
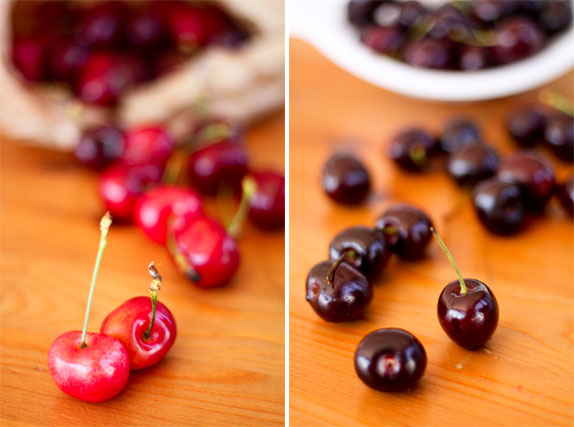
On another note, my friend Mallory at The Salty Cod has rallied me to participate in Jugalbandi's Click! The Photo Event, and this month's theme is RED. So what more appropriate than featuring the spoils of summer produce in Australia?

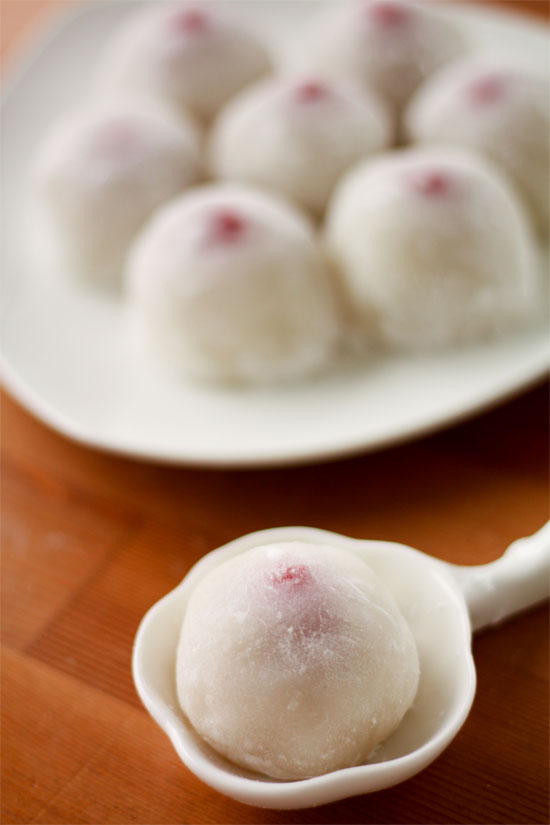
But after splurging on these fruits (and some luscious mangoes too), I have to justify their purchase by making something with them. I decided to start with an old nemesis: strawberry daifuku, or Japansese rice cake with bean paste and strawberry filling. I have always been mesmerised and obsessed with Japanese wagashi (traditional sweets), because not only are they hand-crafted with utmost meticulous care; their shape, colour and appearance reflect both simplicty and seasonality to the highest order. I have always wanted to learn the skills to make these little beauties, but for the longest time, I could not find any books which deliver its instructions in English.

Well, I still could not actually. But my persistence finally paid off. On my last vacation home to Jakarta, Indonesia, I met the executive chef of the newly opened Ritz Carlton Jakarta, who happened to be Japanese, and who coincidentally also runs a newly opened cooking school which offer short courses in traditional Japanese sweets---aka wagashi!!

So I immediately signed up for two items: strawberry daifuku and a spring wagashi called kiku. So far I have stored what I learnt in the recesses of my brain, but last week, in the face of a punnet of rapidly ripening strawberries and the prospect of having to make a light, easy-to-eat summer dessert for a picnic slash movie at Moonlight Cinema at the Royal Botanical Gardens, I decided to make these old favourites of mine. I have modified the recipe and method to make the sticky dough easier to handle, and replaced the red bean paste with white bean paste, which I think complements the strawberries better. Not only is this sweet light, healthy, completely gluten-free (here's to you, Mallory!!), it is so delicious I could not stop eating them!! You can also adjust the sugar to your own liking, or omit them from the dough. I would, however, recommend not to completely remove them from the bean paste, just for that bit of sweetness that makes life so much sweeter!!


Strawberry Daifuku
(makes 13)


For the skin

125g dango-ko (a mixture of glutinous and non-glitunous rice flour. In general, shiratama-ko is the preferred flour to make daifuku, but I discovered that the skin made out of dango-ko is easier to handle, with minimal sacrifice to the glutinous texture)

170g water
125g confectioners' or icing sugar
Potato starch, to dust


For the filling

300g lima beans, soaked for 6-8 hours in cold water, skin stripped off
100g caster sugar
50g water
13 small strawberies, stemmed and hulled


Place lima beans and soaking water in a stock pot and boil. After boiling point, add more water (about 250-300g), and continue heating. Bring up to boil again, then strain off liquid and immediately refresh beans in cold water. Soak the beans in cold water for about 5 minutes. Return the beans to the stock pot, fill with plenty more water, and simmer at low heat until beans are tender and crumble easily. If you are unsure, it is better to simmer the beans a little bit longer to ensure a smooth paste. Strain off the water and place beans into a large bowl. Add some cold water into the bowl, stir and wait a minute or two until bean paste settles at the bottom. Skim off any floating impurities off the surface of the water. Repeat three to four times until the the top layer is free of impurities. Place a large, clean tea towel over a bowl, and pour the bean paste. Squeeze hard to ensure all the water is removed from the bean paste. Make sugar syrup by combining water and caster sugar in a saucepan until boiling. Add half of the raw bean paste into the boiling sugar syrup, stir to combine, and boil again while stirring continuously. Add the rest of the raw bean paste into the mix and continue to mix at low heat. Continue cooking until most of the liquid has evaporated. A good way of telling is to bear in mind that the paste has to be moulded around the strawberries---thus you don't want it to be too wet or too dry and crumbly. Cool down, and divide paste into 13 equal portions. Roll into balls, and flatten slightly. Set strawberries on top of disks, and mould bean paste around strawberries, leaving a portion of the tip uncovered. Refrigerate while you get the skin ready.


Combine all ingredients in a bowl, mix well, and place in a steamer. Depending on your flour, you might need more or less water. If unsure, it is better to add more water, as this will only affect the steaming time required, and not have any effect on the texture of the skin. Steam for 20 minutes, checking and stirring every 5 minutes to ensure that skin is steaming evenly. In the meantime, wet a large tea towel and dust work surface with potato starch. Transfer dough into the center of the wet tea towel. Be very careful as dough will be very hot and sticky. Fold the tea towel into two, with the dough encased inside, and roll the dough into a log. Cut this log into 13 equal portions. Work with a little at a time, and keep the rest of the dough covered. Taking a piece, flatten into a round disc and set onto the dusted surface (roll it into a ball first if you need to---if dough is too sticky, encase it in the wet cloth and use it to help you roll it into a ball.) Stretch the dough out a little, and set the tip of the strawberry down on the surface of the disc. Pull up the sides so that they join together, and turn the dough around and dust the bottom with a little potato starch to seal.


And the cherries, you say? Well, I just have to wait a little longer until I settle down in my new job to start baking again. I just hope by then it will not be too late to buy more cherries.

Tuesday, December 30, 2008

On Turning 24 and the ensuing chaos


Last Christmas, I turned 24.

Yes, you read right. My birthday falls on the most joyful day of the year. But I do not know if receiving only one present per year instead of two is so joyful after all. J is the only one who gives me a mid-year present to compensate for it. (Does it take that many guesses to find out why I stay with him?)

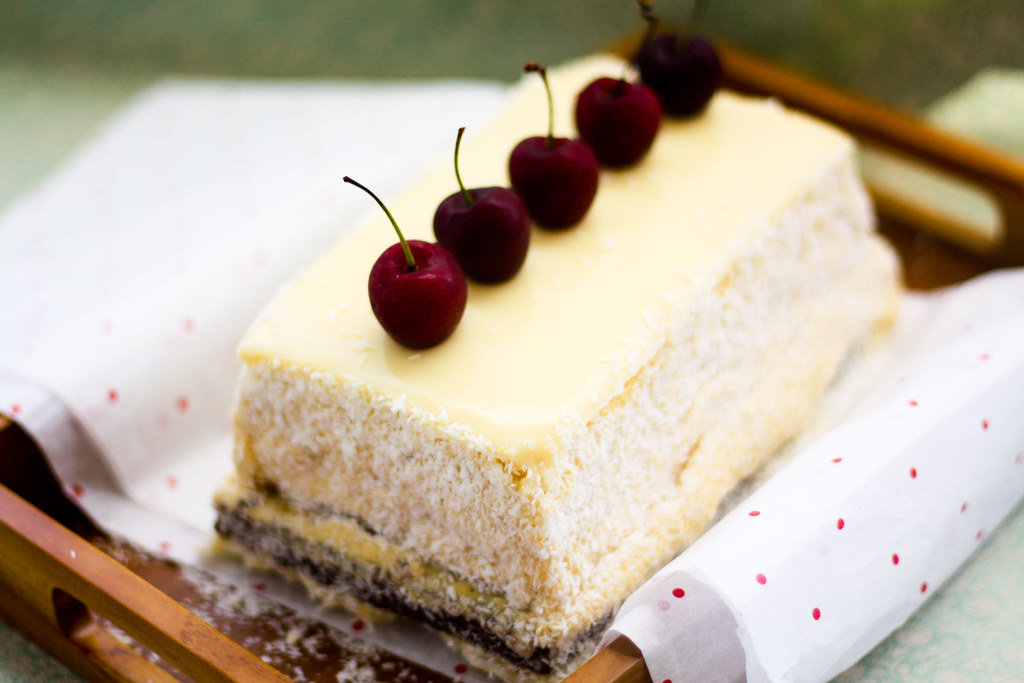
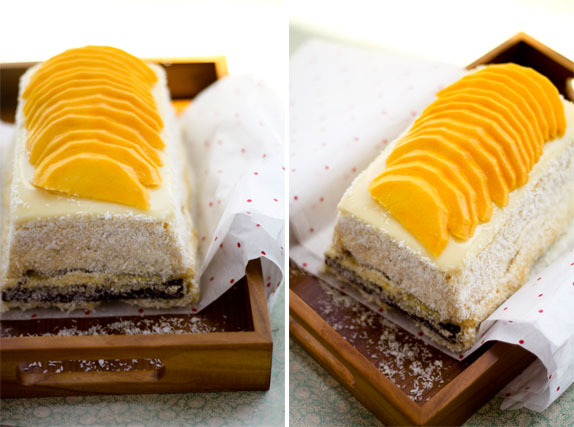
But seriously. Because I had more than my fair share of baking to do this Christmas---mostly for the party at J's parents house on Boxing Day---I decided that the French buche de noel, the December Challenge for Daring Bakers, can multi-task as my birthday cake.

I was really looking forward to this challenge, and decided on the following component to complement the warm Australian Christmas:

-Coconut dacquoise
-Mango mousse
-Cinnamon and vanilla creme brulee
-Coconut crisp insert
-Cinnamon-milk ganache insert
-White chocolate icing

Everything went well until the day I took the log out of the mold to glaze. First, the icing quantity specified in the recipe proved too little to sufficiently cover the log. So, being a smartass, I made another batch and though: It should be fine if I cover it with another layer. Well, guess not.


My icing got too heavy and slipped down the sides of the cake. So in the end I had to trim off the icing on the sides with a palette knife and cover the whole thing in dessicated coconut to mask its ugliness. Oh, but wait, there's more.

While I was defrosting my log, I noticed that the mango mousse started to resemble a very runny mango custard, and was behaving in the same way. When I lifted it up, the upper half started to slide around a bit, and right then I knew that I should have gone out to buy some gold-strength gelatin leaves instead of being so cocksure that titanium-strength ones would do the same job. So, long story short: I ended up serving mango goo to people at Christmas. Thank God family (and boyfriend) do not judge.


This month's challenge is brought to us by the adventurous Hilda from Saffron and Blueberry and Marion from Il en Faut Peu Pour Etre Heureux.
They have chosen a French Yule Log by Flore from Florilege Gourmand

Wednesday, December 10, 2008

A late pre-Christmas Caramel Cake and some thoughts

So it's finally over...my two years of studies culminated in a presentation and a final hand-in earlier today. And I am free. But what awaits ahead, I wonder? I don't know. No clear path seems to be presented to me. It is definitely time to look for a full-time career, but am I, with my bird bones and 5 foot 1 frame, cut out for the long hours, physical strain and stress that working in a kitchen presents? But if not, what career path do I pursue? I cannot imagine myself working too far away from food---I love it so much, too much to stay away from it.

Pondering the fore-mentioned thoughts lead to another. During my spare time (which recently has been, well, spare), I ponder about the people, food, and places. More specifically, about why people get so emotional when it comes to food. How many times have you been upset when your dessert came out not less stellar than its description on the menu? And how many more when you were made to wait a little longer than expected for your meal?

I had the fortunate experience of tasting fresh walnuts at the market yesterday. J insists that I pair it with some gorgeous, plump raisins that we bought at the same stall. The first bite, and I knew I found a new addiction. The walnuts were unlike the anything I have ever tasted. I popped one into my mouth, instinctively waiting for that bitterness that was always present in all that I have tasted thus far. But nothing came. Just the smooth, subtle taste of the nut.

Why am I suddenly talking about things that has nothing to do with my Caramel Cake post, you ask? Because working in the industry has led to an observation that people get very personal when it comes to food. I have the fortune of not having to work Christmas this year or last year. But considering how many restaurants are open, I can't help but wonder: How much thought do people give to the food that is served to them at a restaurant/hotel/cafe? How much thought do they give into the preparation that took hours to complete, the hours of labour, the injuries and physical and mental stress that take place in a commercial kitchen? How much thought do they give to the people who will cook and serve them, and probably hundreds other, their food on Christmas Eve and Christmas Day? Do they ever think, if even for the slightest moment, that some people had to sacrifice being with their families on that one special day just so they could eat out? I am aware that there is a whole other side to it: people who would say that eating out at a certain restaurant on Christmas Day has been a ritual for the family for 30 years, and that I have no right to judge, etc. etc. But please, I am not looking for a fight. Merely a discussion, and a sanctuary where I can let my thoughts loose. I am by no means condemning you for eating out on Christmas Day, gee, I personally have done that so many times.

Being a chef is, in a way, a thankless job. We slave away days and hours making food for people we do not know and do not meet. (Unless you are the owner or head chef of a restaurant, in which case you probably no longer cook as much.) Your sighs of appreciation and moans of pleasure do not reach our ears unless you send your compliments by virtue of a front of house staff. And that is rare. They usually never leave your table, and are reserved for the ears of friends and acquaintances.

So what pleasures does being a chef brings? Certainly not the long hours, low pay or lack of recognition. I suppose the feeling that you have given a part of yourself to create something that you can share with others. And to work so closely with all the things that you are passionate about---the best fresh ingredients, the merging of flavours, the beautiful art that lies on a plate....I think that personal gratification is as important, if not more so, than recognition and acknowlegdement.

So, if you are still with me, I will finally resume normal mode and actually write about the November Daring Bakers' Caramel Cake. The cake, I think, was amazing, even though I made my caramel syrup lighter than suggested. The frosting, though, was so tooth-achingly sweet I cringed at the first bite. Yes, a sugar fiend like me. Can you imagine? Though to its credit (and Shuna's), it was one of the best frostings I have ever worked with. I spread it, chill it for a couple of minutes, and smooth it---and I get the perfect, smooth frosting! I had to discard some of the frosting because one layer of cake broke on me and I was adamant that I have the perfect cake this time. So I ended up with less and had to compromise on using whipped cream for the side. I also added some red currants to introduce some tartness to the cake. I only noticed how Christmas-sy the whole cake looked after I was done, so I decided that I would call this my pre-Christmas Caramel Cake.

Thank you Shuna of Eggbeater for the caramel cake recipe, and Alex, Dolores and Jenny for hosting this month's challenge. And if any of your are interested in making the cake, you can find the recipe here.

Saturday, November 29, 2008

Daring Bakers Challenge...postponed


So, yes. I know what date it is today. I had the cake baked up yesterday to be decorated, photographed and blogged today. Until last night. The following conversation took place between me and my 'little' sister after I came home from work last night.

Sis: Hey, can you bake me some cupcakes tomorrow?

Me: Err...I kind of have another cake to finish up tomorrow.

Sis: But it's my 21st birthday!!

------Silence-------

Me: Your birthday isn't until next week!

Sis: Yes, but I'm celebrating it tomorrow because some of my friends have plans to go overseas next week.

Me: Ok, what kind of cupcake would you like?

Sis: (Showed me a photo of a mini woodland scene atop a cupcake) Can you do 21 of these?


So in the end, blood is thicker than water and I had to acquiesce. I emailed Lisa to tell her that some last minute things have cropped up, and therefore I will have to postpone my posting for this month's caramel cake until next week. Those who thought that I was going to completely skip the challenge should take a second look at the name of my blog!! So be back next week and I'll have my cake up here.

Oh, in the end we negotiated and settled for butterflies perched on top of the cupcake.

Saturday, November 22, 2008

Cake masquerading as bread, and spread acting like ice cream


Ahem.. I did not realise how fast time flies these days. I know that I promised you all that I will post more frequently after I come back from my vacation, and even made a pact with Mallory to sacrifice sleep for blog. So far, I think she's the only one who's kept to that oath.

But my new job is zapping up my energy and my time in the ways that a mini cake-producing nuclear power plant would these days. And to all of you who are pondering about the reality behind cake shop/wholesale/catering vs. restaurant work, let me tell you something. Working in a cake shop which multi-task as a wholesaler/caterer is not as stress-less as you think it is. Wait, maybe I was the only one who thought so.


But enough about me. One of the reasons I staged a comeback sooner than I thought I would was due to the fact that 3 nudges were sent my way, a couple of days apart from each other, from 3 fellow bloggers whose blogs and creations I hold in the highest regard. Y , Helen, Mallory, thank you!! I know it sounds rather silly, but your emails make me really happy. It's really good to know that my absence is felt among visitors of my blog, so thank you!!

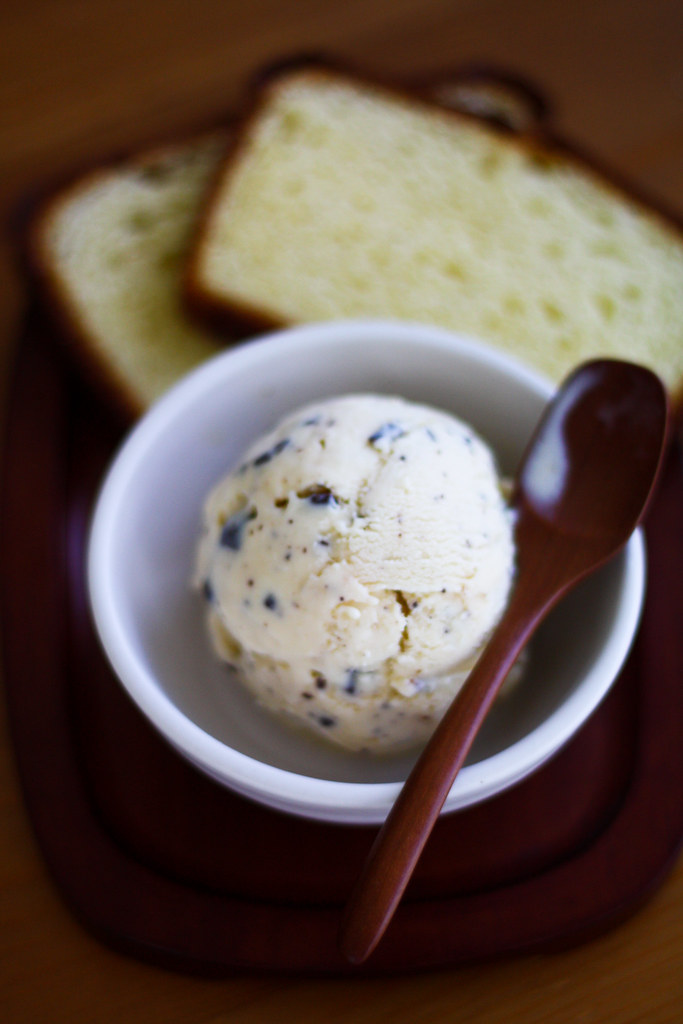
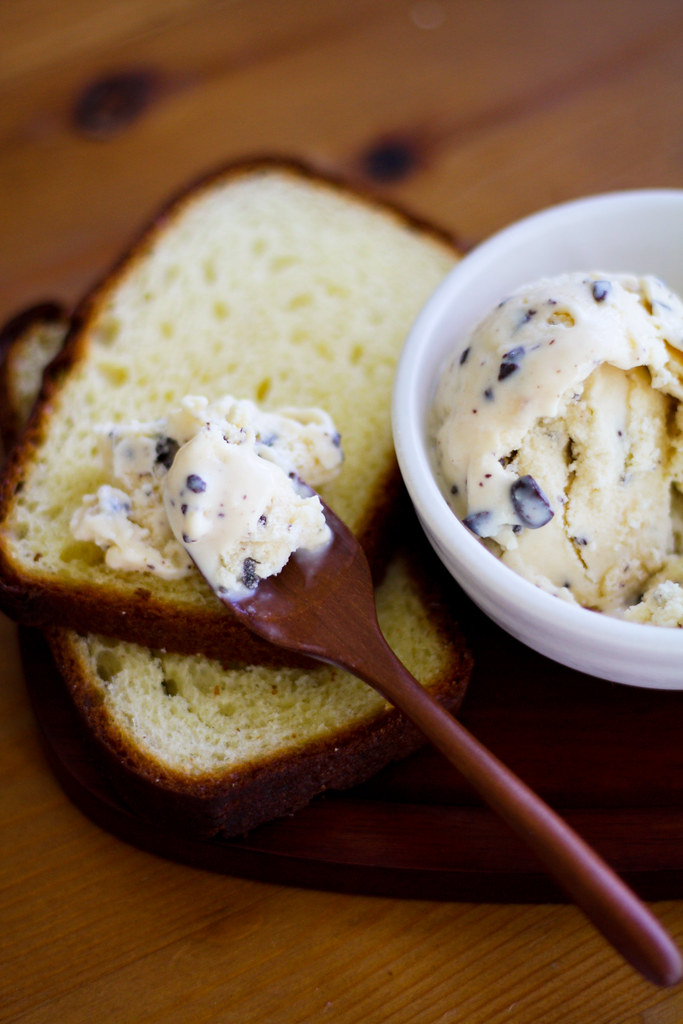
So we can now move on to the real treat. Aran of Cannelle et Vanille did a post on brioche some time last week. One look at her photos and I was smitten!! Her brioche looked simple, comforting, and delectable; in other words, perfect!! Her post happened to coincide with the day off I was having the day after, so I immediately lunged at the chance to make a loaf for myself. I had made a batch of peanut butter ice cream a few days before, so I decided to make an ice cream brioche sandwich as an afternoon treat. But it turns out that the aroma emanating from the oven was too much for J and my brother. They could not even wait until the brioche has cooled down a little bit before launching attacks from both sides of the loaf. As for me, I got to have a couple of slices, and a couple more to photograph with for the sake of this post, before they ate all of it. (Yes, they got to the ones in the photo too. They could barely wait 'til I finished photographing.)


Peanut Butter Ice Cream with chocolate chips

1 litre milk
200g sugar
50g glucose
150g egg yolk
100g peanut butter
50g good quality dark chocolate, chopped


Combine milk, glucose and half the sugar in a saucepan, and heat to boil. Stir occassionally to prevent the mixture from burning. Whisk egg yolk and the remaining sugar together until pale. Pour boiling milk mixture into the yolk/sugar mixture while whisking. Pour back the anglaise mixture into the saucepan and reheat until the thermometer registers 81 degree Celsius. As this recipe does not contain cream, the anglaise will not thicken enough to coat the back of a wooden spoon, so trust your thermometer. Add peanut butter, whisk to combine and chill before churning in an ice cream maker. Each ice cream maker is different, but the approximate time needed on mine is about 20 minutes. Always keep in mind that due to the absence of cream, this ice cream will not turn out as thickly as normal ice cream. About 2 minutes before the ice cream finishes churning, add the chopped dark chocolate.

Wednesday, October 29, 2008

A Cameo Appearance by...


To be honest, I was a little scared when I read what the challenge for this month was. Just a little.

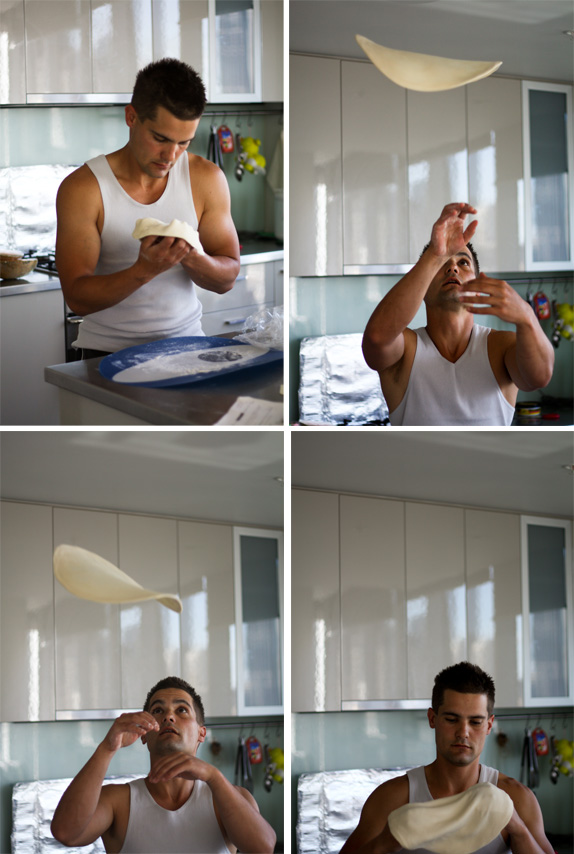
Well, I mean, I've made pizza dough before, but have never used the 'toss' method. This method is a nightmare for a control freak like me. Thankfully, I have help on hand. A veteran pizza maker who also happens to be yours truly's boyfriend. Isn't that convenient? The challenge suddenly turned from something daunting to something I was looking forward to.


I just hope Rosa doesn't mind the help I was getting. Not that I didn't try, but the photos of him tossing the dough turned out much, much better. Seriously. The photos he took of me tossing the dough turned out so tragic I would have to implore you to spare me from putting it up on a public domain such as this.

So, moving on to the more important topic of toppings and sauces. I decided on a sweet pizza, despite J's protests. I decided that since we are going into summer (actually today feels more like early, early spring), I might as well do something light and easy. Fruits immediately came to mind. But not just any fruits. I specifically wanted tropical fruits. Blame it on my recent trip back home. I wanted to recapture all the flavours of the tropics in this pizza.


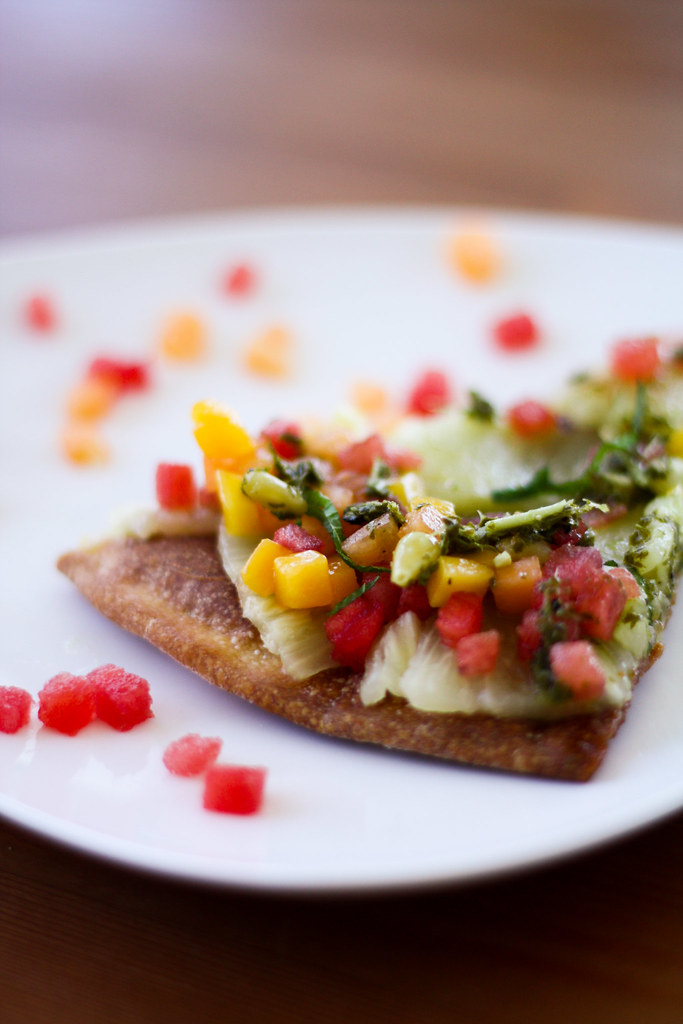
So I decided on a pineapple 'carpaccio' pizza topped with rockmelon, mango and watermelon brunoise, with a drizzle of pine nuts-mint herb oil and a garnish of mint julienne. You don't have to tell me that it sounded doubtful; believe me, I know. But despite all, I decided to go along with this combination.

It actually did not taste bad at all. But there is definitely room for improvement. Like not overbaking the pizza crust, resulting in a hard shell with a slight bitter taste. Or adding more pine nuts-mint herb oil. Or caramelising the pineapple 'carpaccio' before putting them on the crust. Or using a fruit compote rather than herb oil to impart more sweetness to the pizza.

But overall, I'm pretty happy with this first attempt. All that's left is to play around with the component to get the best possible result. After all, that's what being a DB is all about, no?

A big thank you to Rosa for choosing this month's theme and recipe; J thought it made a really, really good pizza dough, and even asked if I could print him a copy to take home!